
 Water Damage
When an ice dam forms at the edge of the roof, meltwater backs up under the shingles and comes through ceilings and walls. Here is what to do in the first hour, how to deal with the ice safely, what happens to the insulation and drywall inside, and how Ontario insurance usually treats ice damming.
In This Article
How an ice dam ends up inside your house
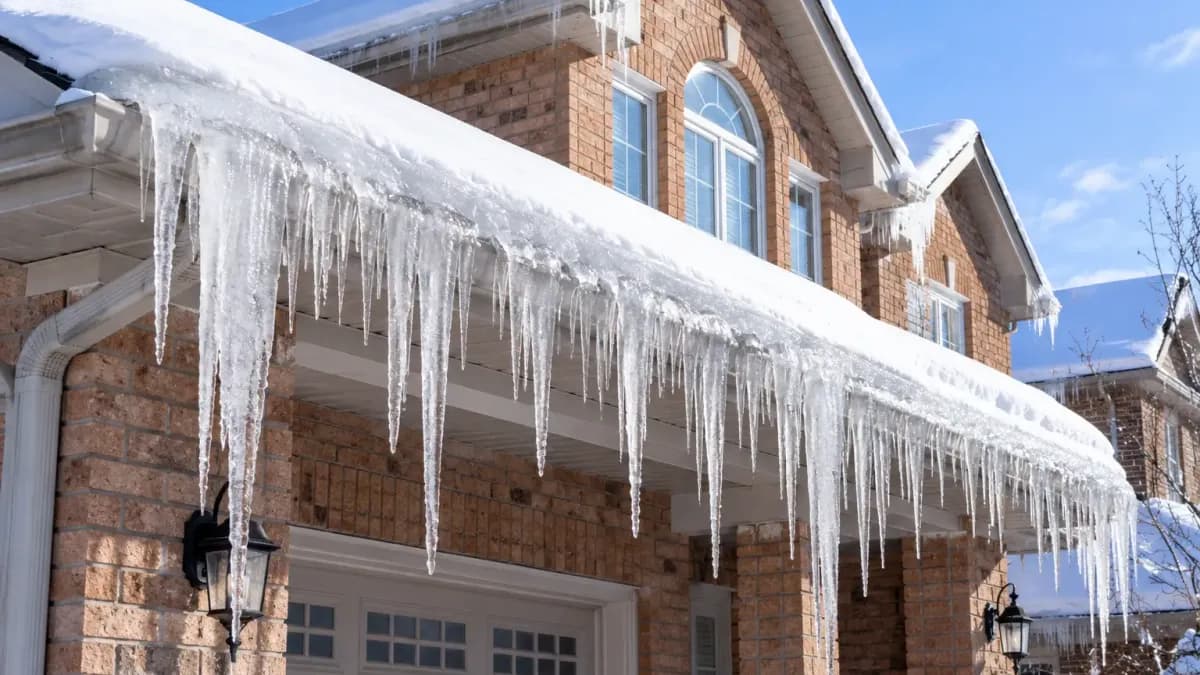
An ice dam is a ridge of ice that builds up along the lower edge of a roof, at the eaves and in the gutters. It forms when heat escaping from the house warms the upper part of the roof, the snow there melts, and the meltwater runs down to the colder overhang at the eaves, where it freezes again. Each day the ridge grows, and the water behind it has nowhere to go.
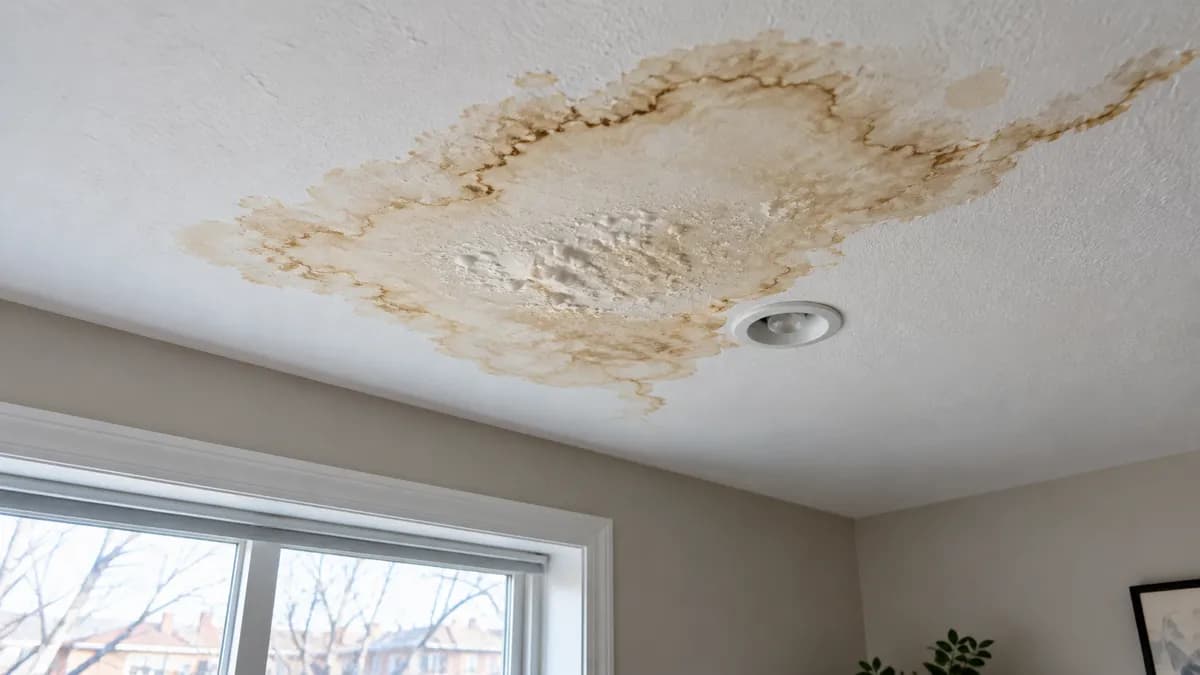
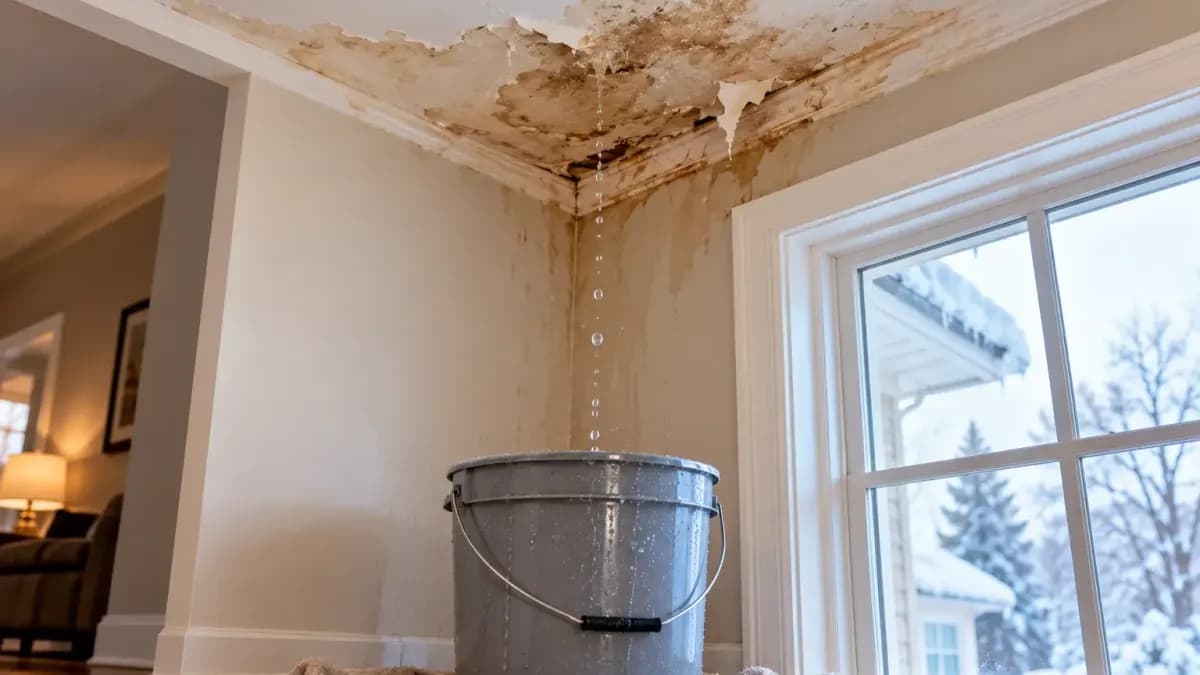
Shingles are designed to shed water running downhill, not to hold back a pond. Once water pools behind the dam, it works its way up and under the shingles, past the roof deck, and into the attic and the tops of exterior walls. Inside the house it shows up as brown stains on the ceiling near outside walls, water running down the inside of a wall or window frame, and drips from light fixtures.
The heavy snow and repeated freeze and thaw cycles of recent GTA winters, including February 2025, sent thousands of homeowners searching for who to call about an ice dam leak. This guide covers what to do right away, how to deal with the ice without making it worse, what happens to the insulation and drywall you cannot see, and how water damage restoration and insurance usually work for ice damming in Ontario.
Signs an ice dam is leaking into your home
Ice dam leaks have a recognizable pattern. They happen in cold, snowy weather or during the first mild days after it, and they appear close to the outside walls rather than in the middle of a room.
- Thick ice along the edge of the roof and in the gutters, often with large icicles hanging from the eaves.
- Water stains or wet spots on the ceiling within a metre or so of an exterior wall.
- Water running down the inside of an exterior wall, window frame or door frame.
- Bubbling or peeling paint, or soft, sagging drywall, along the top of an outside wall.
- Drips from pot lights, bathroom fans or smoke detectors near the eaves.
- Wet or frosty insulation in the attic above the eaves, if you can safely look.
What to do in the first hour
When water is actively coming in, the goal is to keep people safe and stop the damage spreading inside while you arrange help for the roof.
- 1Turn off power to any light fixture, fan or outlet that water is dripping through or near, at the breaker. Do not touch wet electrical fixtures.
- 2If the ceiling is bulging with trapped water, put a bucket under it and pierce the lowest point with a screwdriver to let the water drain in a controlled way. A ceiling that gives way on its own is far messier and more dangerous.
- 3Move furniture, electronics, rugs and belongings out of the area and protect what cannot be moved with plastic sheeting.
- 4Catch the water with buckets and towels and mop up standing water from floors.
- 5Take photos and video of the ice on the roof, the stains and the water inside, and of damaged belongings, before you clean up. Your insurer will want them.
- 6Call your insurer or broker to report the damage and ask how they want you to proceed.
- 7Arrange safe ice removal and water damage restoration. The ice is the cause; the water inside is what keeps causing damage after the dripping stops.
How to deal with the ice dam safely
There are two parts to dealing with an active ice dam: reduce the snow feeding it, and open a path for the trapped water to drain.
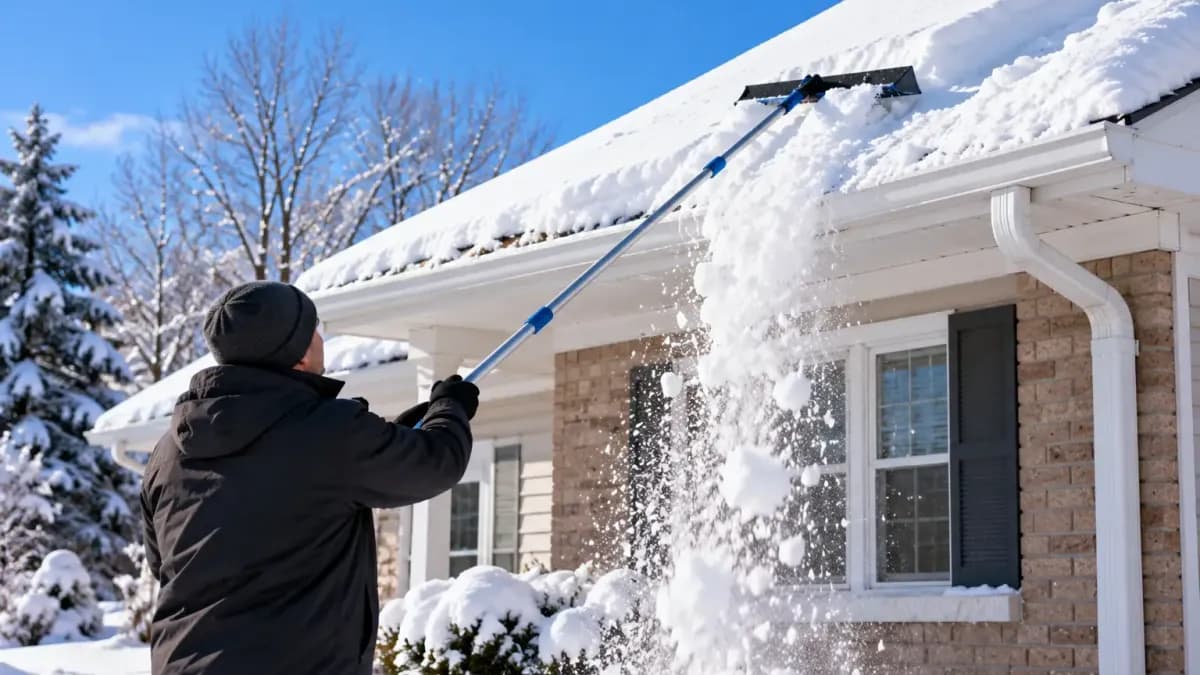
What you can do from the ground
Most of the useful work can be done without leaving the ground, and it is the safest place to be when snow and ice start sliding.
- Use a long-handled roof rake to pull fresh snow off the lower metre or two of the roof, working from the ground and standing well clear of falling snow and ice.
- Clear snow and ice from downspout outlets so meltwater that does get through can drain away from the house.
- A long sock or nylon stocking filled with calcium chloride ice melt, laid across the dam and hanging over the edge, can melt a channel for water to escape. Do not use rock salt, which damages shingles, gutters and plants.
When to call a professional
Large dams, two-storey roofs and anything that needs a ladder on ice are jobs for a roofing or ice dam removal contractor. The safest professional method is low-pressure steam, which cuts through the ice without damaging the shingles. Pressure washers, hammers and heat guns all risk damaging the roof.
The damage you cannot see
By the time water stains appear on a ceiling, the water has already passed through the roof deck, the attic insulation and the drywall. Removing the ice stops new water coming in, but the materials it soaked do not dry on their own in a cold house in winter.
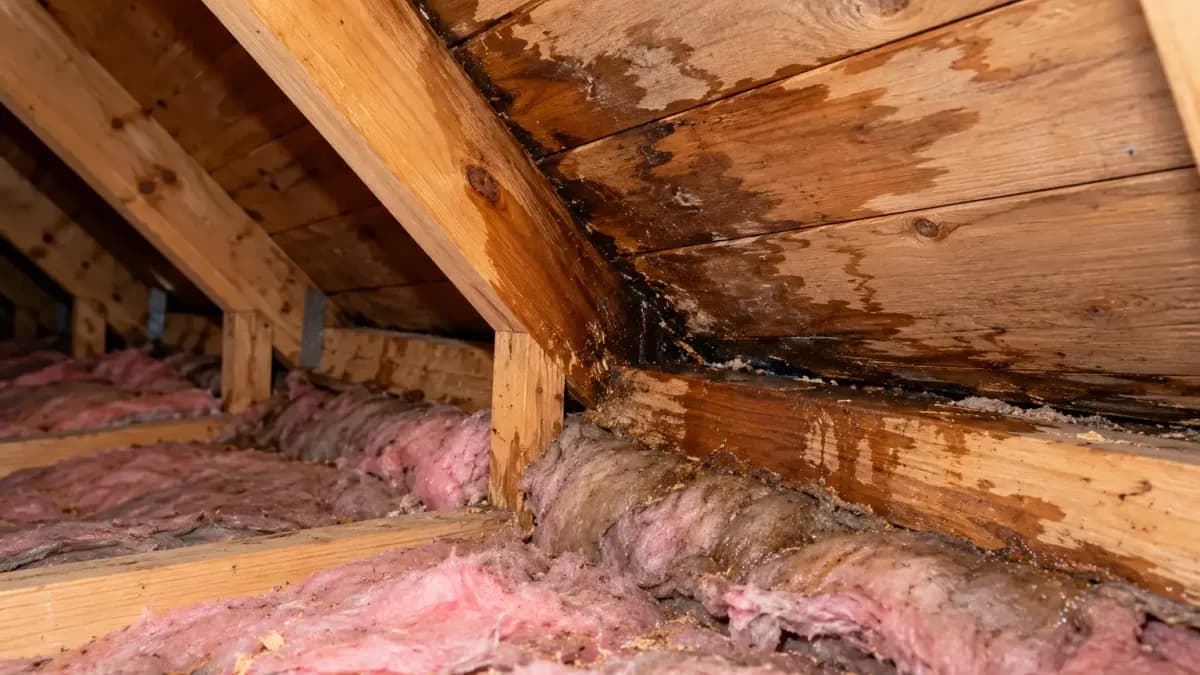
- Attic insulation above the eaves gets saturated and compressed. Wet blown-in insulation clumps and loses much of its insulating value, which makes the next ice dam more likely, and it usually needs to be removed and replaced.
- Water runs down inside exterior walls, wetting the wall insulation, framing and the back of the drywall where you cannot see it.
- Drywall ceilings can sag, crack along the seams, and in severe cases come down.
- Wood framing, roof sheathing and subfloors near outside walls can stay wet for weeks.
- Mould can start growing on wet materials within 24 to 48 hours. Our guide on how long mould takes to grow after water damage explains why speed matters.
How ice dam water damage is restored
Restoring an ice dam leak follows the same process as any water damage job, adapted for the fact that the water came in from above and travelled through the attic and walls.
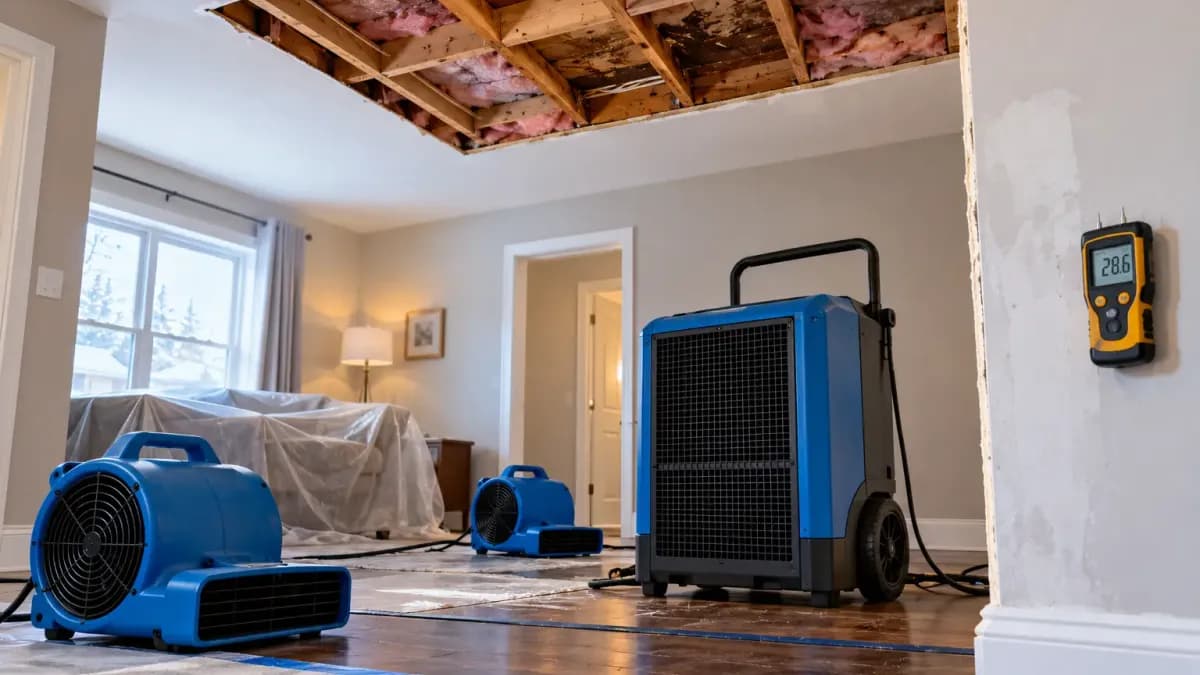
- 1Inspect and map the moisture with meters and thermal imaging in the ceiling, walls, attic and floors below.
- 2Remove saturated insulation from the attic and wet materials that cannot be dried, such as sagging drywall and soaked ceiling sections.
- 3Set up commercial dehumidifiers and air movers for structural drying, with daily readings until materials reach dry standards.
- 4Clean and treat affected framing and sheathing to prevent mould, and handle any existing growth under containment.
- 5Replace insulation, drywall and finishes once everything is confirmed dry. Our drywall repair team rebuilds the ceilings and walls.
- 6Document the work with photos, readings and a detailed scope for your insurance claim.
Does home insurance cover ice dams in Ontario?
Whether ice damming is covered is one of the most common questions Ontario homeowners ask after a leak, and the honest answer is that it depends on your policy. Many comprehensive home insurance policies in Ontario cover sudden and accidental water damage to the inside of the home caused by ice damming, including the cost of drying and repairing ceilings, walls, insulation and damaged contents. Some policies exclude it or limit it, and coverage for the roof itself or for removing the ice may be treated differently from the interior damage.
Insurers also look at maintenance. Damage that builds up over weeks because the problem was ignored, or that is linked to long-term neglect, is more likely to be disputed. That is why acting quickly and documenting everything matters.
- Photograph the ice, the roof edge, every stain and wet area, and damaged belongings before cleanup.
- Report the damage to your insurer or broker promptly and ask for a claim number.
- Keep receipts for emergency costs such as ice removal and protective measures.
- Do not throw away damaged items until the adjuster has seen them or approved disposal.
- Ask your restoration company for moisture readings and a written scope, which adjusters rely on.
How to prevent ice dams next winter
Ice dams are a symptom of heat escaping into the attic. Removing ice treats the symptom; keeping the roof deck cold treats the cause.
- Air-seal the attic floor around pot lights, the attic hatch, plumbing stacks, wiring and wall top plates so warm house air stays in the house.
- Make sure attic insulation is deep and even, especially at the outer edges over the exterior walls, where it is often thinnest.
- Keep soffit vents clear with baffles, and make sure there is enough roof venting near the peak so the attic stays close to the outdoor temperature.
- Make sure bathroom and kitchen fans vent all the way outside, not into the attic.
- Keep gutters and downspouts clear before winter so meltwater can drain.
- Rake fresh snow off the lower part of the roof from the ground after heavy snowfalls.
- Heat cables along the eaves can help on problem areas, but they treat the symptom and need to be installed correctly.
- When the roof is replaced, make sure an ice and water protection membrane is installed along the eaves, as the Ontario Building Code requires on most sloped roofs.
Ice dam leaking right now?
If water from an ice dam is coming through your ceiling or walls, Rosehill Restoration Services provides 24/7 emergency water damage restoration across Toronto, North York, Etobicoke, Brampton, Vaughan, Markham and the wider GTA. We extract the water, remove wet insulation and drywall, dry the structure with commercial equipment, check for mould, and document everything for your insurer.
For storm-related damage to the outside of the home, see our storm damage restoration services, and for a sense of budget, our guide to water damage restoration costs in Ontario breaks down typical pricing.
Related Restoration Services
Restoration Crews Near You
We respond 24/7 across the Greater Toronto Area. Find your city:
About the Author
Rosehill Restoration Services
IICRC Certified Firm
Rosehill Restoration Services is an IICRC Certified Firm handling water, fire, mould, asbestos, and storm damage across the Greater Toronto Area. Our lead technicians carry Water Damage Restoration (WRT), Applied Structural Drying (ASD), and Fire & Smoke Restoration (FSRT) certifications, and every article here is written from live job experience across GTA properties.
- IICRC Certified Firm
- IHSA COR Certified
- WSIB Ontario Covered
- EACO Member